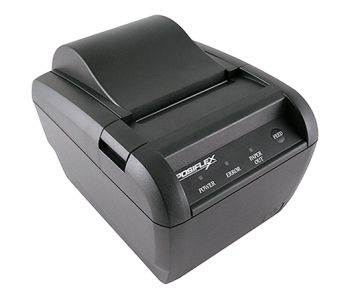
Setting up a Lenovo printer is a straightforward process that ensures you can start printing documents, photos, and more without delay. Lenovo printers are known for their reliability and ease of use, making them a great choice for both home and office environments. This comprehensive guide will walk you through each step of the setup process, from unboxing your printer to configuring it for wireless printing.
Unboxing and Initial Setup
Unbox Your Printer: Carefully remove the printer from its packaging. Be sure to take out all the packing materials and protective tapes. Place the printer on a stable surface near a power outlet and your computer or wireless network router.
Install Cartridges and Paper: Open the printer’s cartridge access door and install the ink or toner cartridges as per the instructions provided. Next, load paper into the paper tray, adjusting the guides to fit the paper size. This helps to avoid paper jams and ensures smooth operation.
Power On the Printer: Plug the printer into an electrical outlet and turn it on using the power button. Wait for the printer to initialize and complete its startup sequence.
Connecting to Your Network
Access the Wireless Setup Menu: Using the printer’s control panel or touchscreen, navigate to the wireless setup menu. This option is usually found under “Network Settings” or “Wireless Settings.”
Select Your Network: The printer will search for available Wi-Fi networks. From the list, choose your home or office Wi-Fi network. If prompted, enter your network’s password to establish the connection. Ensure that you input the correct password to avoid connectivity issues.
Confirm the Connection: Once the printer successfully connects to your network, you should see a confirmation message on the display. Some printers may print a network configuration page to confirm the connection.
Installing Printer Software
Download the Software: Go to Lenovo’s official website and navigate to the “Support” or “Downloads” section. Enter your printer model number to find the appropriate drivers and software for your operating system.
Run the Installer: Download the installation package and run the installer on your computer. Follow the on-screen instructions to install the necessary drivers and utilities. During the installation process, select the “Wireless” option when prompted to configure the connection type.
Add the Printer: After the software installation, your computer should detect the printer on your network. If not, you may need to manually add the printer through your computer’s “Devices and Printers” or “Printers & Scanners” settings. Select “Add a Printer” and follow the prompts to complete the setup.
Configuring Printer Settings
Print a Test Page: To ensure that everything is set up correctly, print a test page. This will confirm that your printer is connected and functioning properly. Most printer software includes an option to print a test page during the setup process.
Adjust Printer Preferences: Access the printer settings through the control panel or printer software on your computer. Configure your print quality, paper size, and other preferences according to your needs. This ensures that your prints come out as expected.
Troubleshooting Common Issues
Connection Problems: If your computer cannot find the printer, ensure that both the printer and computer are connected to the same Wi-Fi network. Restarting your router and printer can sometimes resolve connectivity issues.
Driver Issues: If you encounter problems during installation, check that you’ve downloaded the latest drivers from Lenovo’s website. Reinstalling the drivers may also help resolve issues.
Printer Not Responding: If the printer is not responding, try restarting both your computer and the printer. Ensure all cables are properly connected and that the printer has enough paper and ink or toner.
Conclusion
Setting up Lenovo printer is a simple process that involves unboxing, connecting to your network, and installing the necessary software. By following this guide, you can easily get your printer ready for use, allowing you to enjoy high-quality prints with minimal hassle. Regular maintenance and updates will help keep your printer running smoothly and efficiently. Whether you’re working from home or managing a busy office, a properly set up Lenovo printer can greatly enhance your productivity and convenience.
Leave a Reply
Related Products
You Might Like Also

Lexmark Wireless Printer Setup: A Comprehensive Guide
Set up your Lexmark wireless printer easily with our step-by-step guide. Connect to Wi-Fi, install software, and start printing wirelessly with ease. Read More

1-800-GEEK-SQUAD: Your Direct Line to Expert Tech Support
Call 1-800-GEEK-SQUAD for 24/7 expert tech support, repairs, and device setup. Get fast assistance with troubleshooting and protection plan guidance. Read More

Geek Squad Protection Plan: Comprehensive Coverage for Your Tech
Protect your tech with the Geek Squad Protection Plan: extended coverage, accidental damage protection, and no-cost repairs for peace of mind. Read More

Trend Micro Geek Squad: A Partnership for Comprehensive Cybersecurity
Get comprehensive cybersecurity with Trend Micro Geek Squad: top-tier protection paired with expert support for hassle-free device security and peace of mind. Read More

Geek Squad Canada: Your Reliable Tech Support Partner
Geek Squad Canada offers expert tech support for all your devices. Connect with Geek Squad Canada online, in-store, or by phone for reliable assistance anytime. Read More

How to Download & Install Geek Squad Webroot
Learn how to download and install Geek Squad Webroot for top-notch device protection. Follow our easy steps to secure your tech from online threats with expert support. Read More


