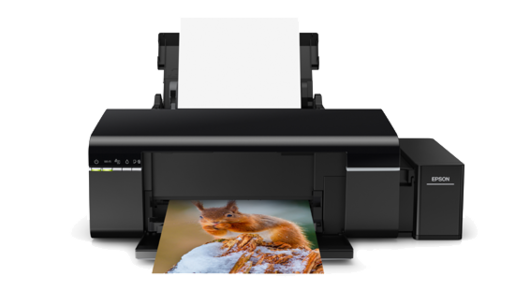
Setting up a new printer can seem daunting, but with this step-by-step guide, you'll have your Epson printer Setup and running in no time. Whether you're connecting via USB, Wi-Fi, or Ethernet, we’ve got you covered.
Step 1: Unbox and Prepare
- Unbox Your Printer: Carefully unbox your Epson printer and remove all packaging materials.
- Check Contents: Ensure you have all the components: printer, power cord, ink cartridges, user manual, and installation CD (if provided).
- Install Ink Cartridges: Open the printer cover and install the ink cartridges. Make sure each cartridge clicks into place.
- Load Paper: Load a stack of plain paper into the paper tray. Adjust the guides so they touch the edges of the paper.
Step 2: Power On and Initial Setup
- Connect Power: Plug the power cord into the printer and an electrical outlet.
- Power On: Press the power button to turn on the printer.
- Language and Preferences: Use the printer’s control panel to select your preferred language and other initial settings.
Step 3: Connect Your Printer
A. USB Connection
- Connect USB Cable: Connect one end of the USB cable to the printer and the other end to your computer.
- Install Drivers: If your printer came with an installation CD, insert it into your computer and follow the on-screen instructions. If not, download the latest drivers from the Epson website.
- Follow Prompts: Follow the on-screen instructions to complete the setup process.
B. Wireless (Wi-Fi) Connection
- Wi-Fi Setup: On the printer’s control panel, navigate to the Wi-Fi setup menu.
- Select Network: Choose your Wi-Fi network from the list of available networks.
- Enter Password: Enter your Wi-Fi password using the printer’s control panel.
- Confirm Connection: Wait for the printer to confirm it has connected to the network. The Wi-Fi indicator should be solid.
C. Ethernet Connection
- Connect Ethernet Cable: Connect one end of the Ethernet cable to the printer and the other to your router or network switch.
- Printer Settings: On the printer’s control panel, go to network settings and ensure the wired connection is active.
- Install Software: Follow the same process as the USB connection for driver installation.
Step 4: Install Printer Software
- Download Software: Visit the Epson support website and download the necessary software and drivers for your printer model.
- Run Installer: Open the downloaded file and run the installer.
- Follow Instructions: Follow the on-screen instructions, selecting the connection type (USB, Wi-Fi, Ethernet) when prompted.
- Complete Installation: Finish the installation process and restart your computer if necessary.
Step 5: Print a Test Page
- Access Printer Settings: Go to your computer’s printer settings.
- Print Test Page: Select your Epson printer and choose the option to print a test page.
- Verify Print Quality: Ensure the test page prints correctly and check the print quality.
Troubleshooting Tips
- Connection Issues: If the printer isn’t connecting to your Wi-Fi network, check that the network password is correct and the printer is within range of the router.
- Driver Problems: Ensure you have downloaded the correct drivers for your printer model and operating system.
- Print Quality: If print quality is poor, run a nozzle check and head cleaning from the printer’s maintenance menu.
Final Words
Setting up your Epson printer is a straightforward process when following these steps. Whether you're using a USB, Wi-Fi, or Ethernet connection, this guide ensures a smooth and efficient setup. Now, you’re ready to start printing with your new Epson printer!
For further assistance, refer to the user manual or visit the Epson support website. Happy printing!
Leave a Reply
Related Products
You Might Like Also

Lenovo Printer Setup: A Complete Guide to Getting Started
Quickly set up your Lenovo printer with our easy guide. Connect to Wi-Fi, install drivers, and start printing effortlessly from your devices. Read More

Lexmark Wireless Printer Setup: A Comprehensive Guide
Set up your Lexmark wireless printer easily with our step-by-step guide. Connect to Wi-Fi, install software, and start printing wirelessly with ease. Read More

1-800-GEEK-SQUAD: Your Direct Line to Expert Tech Support
Call 1-800-GEEK-SQUAD for 24/7 expert tech support, repairs, and device setup. Get fast assistance with troubleshooting and protection plan guidance. Read More

Geek Squad Protection Plan: Comprehensive Coverage for Your Tech
Protect your tech with the Geek Squad Protection Plan: extended coverage, accidental damage protection, and no-cost repairs for peace of mind. Read More

Trend Micro Geek Squad: A Partnership for Comprehensive Cybersecurity
Get comprehensive cybersecurity with Trend Micro Geek Squad: top-tier protection paired with expert support for hassle-free device security and peace of mind. Read More

Geek Squad Canada: Your Reliable Tech Support Partner
Geek Squad Canada offers expert tech support for all your devices. Connect with Geek Squad Canada online, in-store, or by phone for reliable assistance anytime. Read More


